How To Fix A Bike Puncture On Your Commute
From the tools required to repair a puncture to tips for avoiding them in the first place, follow this handy step-by-step guide to overcoming flat tyres on your bike

Commuting by bike is one of the most convenient, quick and fun ways of getting to and from the office. Until you get a puncture. If you’ve been riding for long enough, there’s a good chance you’ll have encountered the dreaded moment when one of your tyres goes squishy and you find yourself Googling “how to fix a puncture with no puncture repair kit” by the side of the road.
If you’re in a city, you might be lucky enough to be close to a local bike shop that can get you back up and running in no time at all. But if you’re not, that straightforward journey to or from work becomes a nightmare where you have to somehow transport yourself and your bike to your destination.
It doesn’t have to be this way though. Using a combination of prevention, preparation and practice, you’ll be able to fix your next puncture in a matter of minutes, turning that flat tyre into a minor bump in the road.
How To Avoid Getting A Puncture
As the saying goes, prevention is better than cure, and there are a number of quick, easy strategies that can help to minimise your risk of getting a puncture in the first place.
First ensure that your tyres are inflated to the recommended pressure, which will be printed on your tyre. Using a pump with a gauge on it, inflate each tyre to somewhere within the recommended PSI (pounds per square inch) range. This will help minimise the risk of pinch punctures – when the inner tube gets trapped between the wheel’s rim and a hard, sharp edge like a pothole or dropping down from a curb. It’s worth checking your bike’s tyres once a week to ensure they are correctly inflated.
If you’re keeping your tyres inflated and still suffering from repeated punctures, it might be time to get some new tyres. After all, a worn, previously punctured tyre offers up a weaker defence than a shiny, new one.
How To Be Prepared For A Puncture

Even if you do keep your commuter bike’s tyres topped up and in a good condition, a small piece of glass, thorn or flint might manage to pierce through your tyre and puncture your inner tube.
Get the Coach Newsletter
Sign up for workout ideas, training advice, reviews of the latest gear and more.
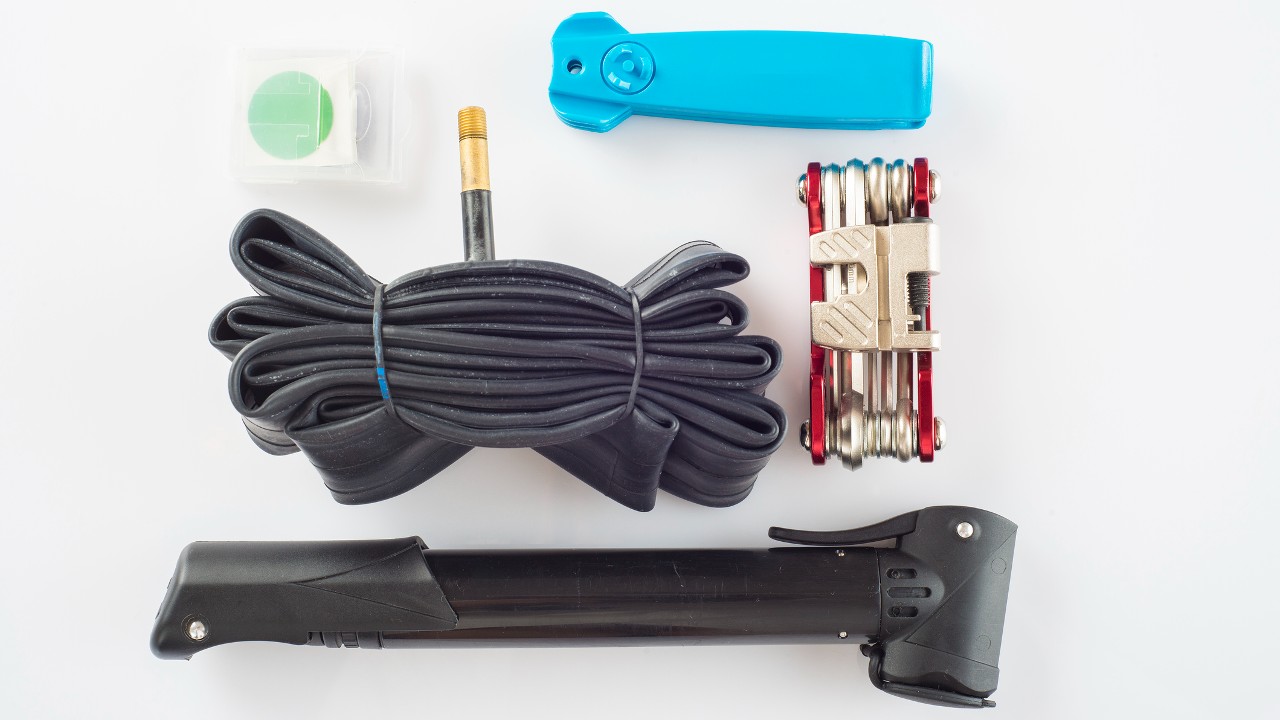
Rather than accepting defeat and taking your bike to a shop to get fixed, it is possible to repair or replace a punctured inner tube in no time at all (more on which below). But first, you’ll need to have some tools at hand:
The quickest way to fix a flat tyre is to completely replace the inner tube with a new one. Stock up on the ones that match your bike’s wheel diameter (generally 700c for most commuter hybrid bikes) and your tyre’s width (again, this will be on the tyre and is generally shown in mm), and make sure to stuff a couple in your commuter backpack or pannier – you don’t want to be stuck if you get two punctures on your way to work, after all.
A more compact method than lugging around spare inner tubes is to pack a puncture repair kit in your commuter backpack. Patching an inner tube is more time-consuming than simply swapping it out for a new one – what with finding the puncture, repairing it and waiting for the glue to dry – but could be a more practical solution than carrying around multiple inner tubes.
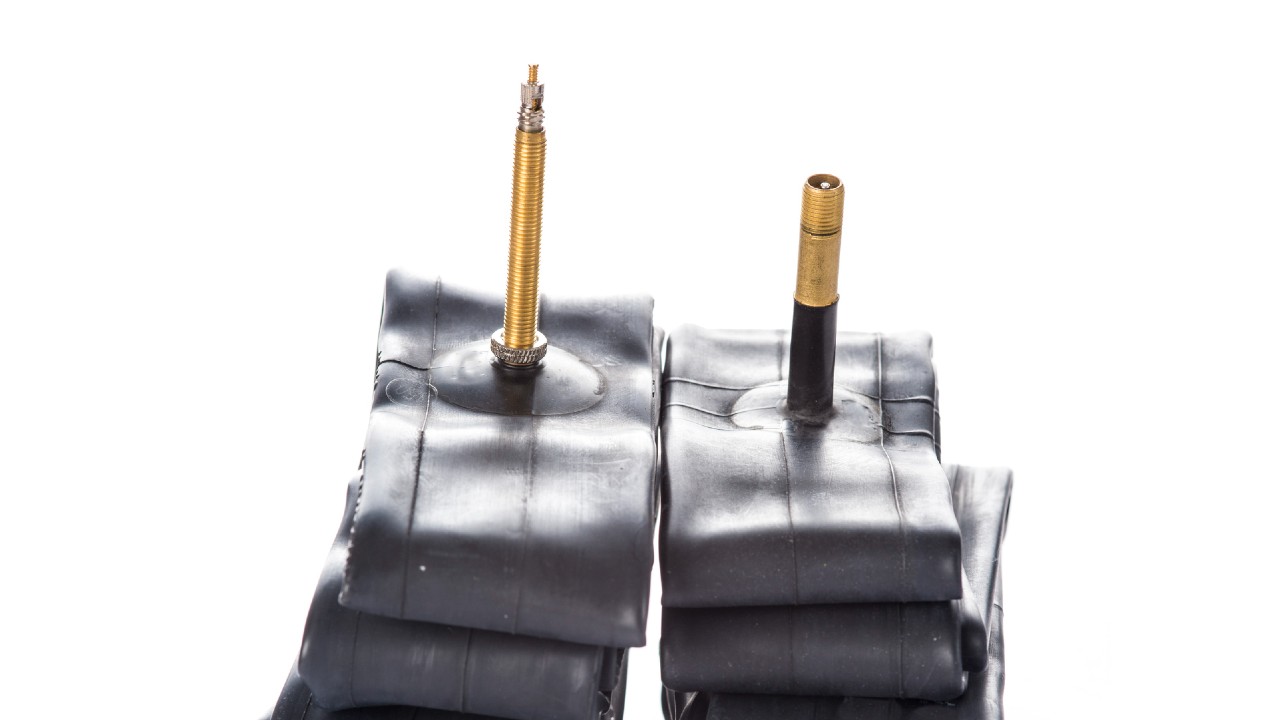
This is an essential item that should be taken on all rides. Make sure it is compatible with the valve of your inner tube (Presta is the thin type common on most modern bikes, Schrader the wider type found on older or off-road bikes), and finding one with a gauge is a bonus.

Most modern bikes will feature a quick-release axle that allows you to remove and reinstall the wheel with no tools required – if there’s a little lever where the wheel is secured to the bike’s fork or frame, then it’s quick-release. Some single-speed or older hybrid bikes don’t have quick-release wheels, though, so you will need to carry a spanner; the most common size is 15mm, but check before buying.
These thin levers will help you get your tyre on and off. Two are better than one, and it’s worth looking out for a set that is plastic coated but reinforced with metal. The plastic will minimise any sharp points puncturing an inner tube, while the metal stops them snapping when confronted with a seriously tight tyre.
Not essential, but things can get greasy.
How To Fix A Puncture

The guide below assumes that you have a standard inner tube and wheel set-up. If you have a tubeless set-up, the below is still useful if the hole in your tyre is too big for the sealant to plug.
Step 1: Undo the quick-release skewer (or unscrew the axle’s bolts). If you have rim brakes, you might need to open the brake release lever. If the puncture is in the rear wheel, it’s a lot easier to remove the wheel if you change gear so the chain is on the smallest chainring at the front and smallest cog at the back. Remove the punctured wheel from the bike.
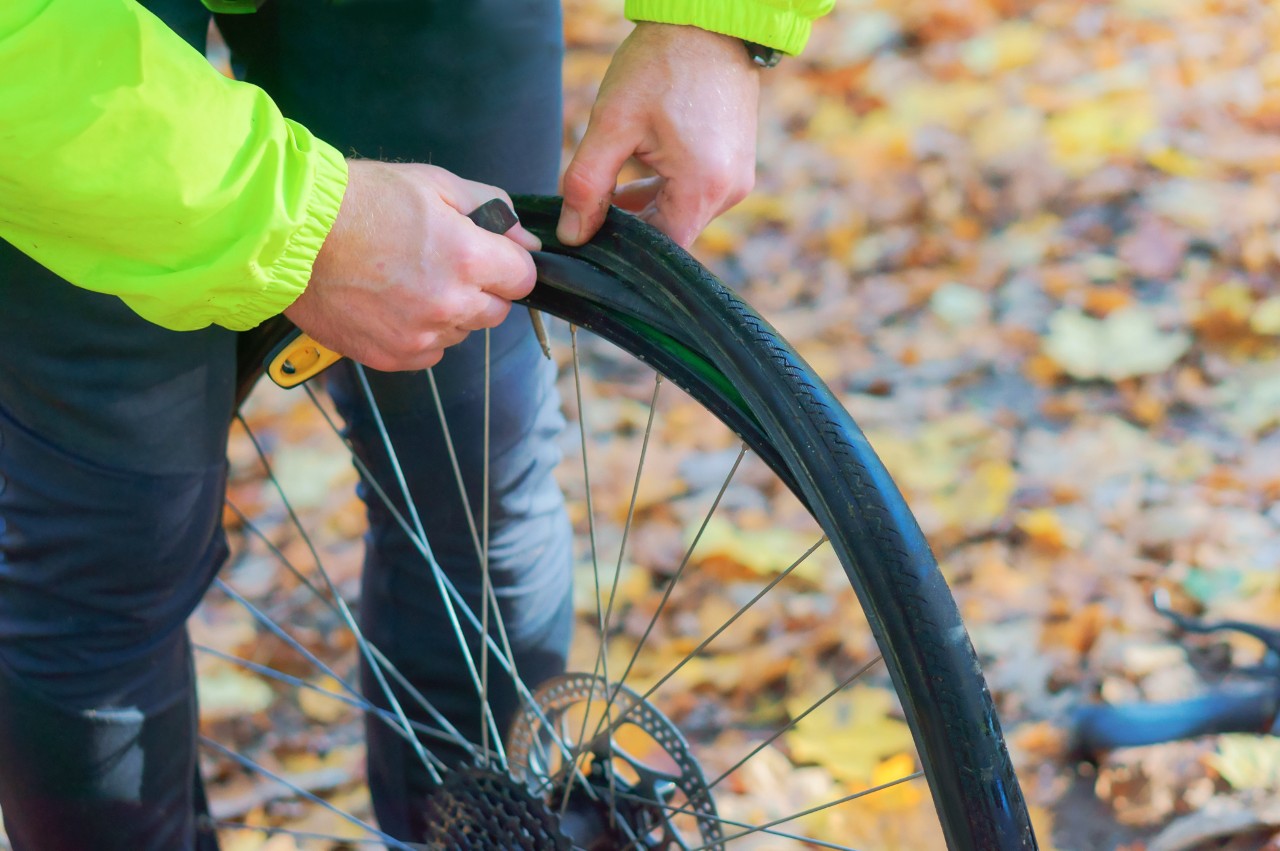
Step 2: Use the tyre levers to prise one side of the tyre off the wheel’s rim.
Step 3: Slide the punctured inner tube out from the rim and remove it completely. To do this you will need to remove the dust cap and unscrew the nut that holds it in place, then push the valve up and through the hole in the rim.
Step 4: Run your hand carefully around the inside of the tyre to check for any sharp objects that might have caused the puncture. Remove anything sharp that you find.
(If replacing the punctured inner tube with a new one, skip to step 6)
Step 5: Find the hole in the punctured inner tube. The easiest way is to inflate it slightly before squeezing it and popping it in a bucket of water and looking for bubbles, but unless you’re commuting to your job as a window cleaner that’s not much help mid-journey. Try squeezing the inflated inner tube and pass it past your ear – the sound of air escaping should help you locate the hole. Follow the instructions on the puncture repair kit to patch the hole.
Step 6: Slightly inflate the repaired inner tube, insert its valve into the hole in the rim and slide the inner tube into the rim bed.
Step 7: This is the tricky bit. With the valve at its furthest point from you, use your tyre levers to lever the bead (the edge of the tyre) back onto the inside of the rim. Work your way around the tyre until it’s back on. If you’re left with a stubborn part that just won’t go on, try pushing the valve up into the rim. This will hopefully give you more room to work with and make it easier to ease the tyre back on.
Step 8: Check that there aren’t any parts of the inner tube trapped between the bead and the rim and inflate slightly. If there are any bulges, your inner tube is trapped, so it may need a bit of massaging to get it sitting correctly.
Step 9: Once clear, you’re all set to inflate the tyre using your pump to the recommended pressure shown on the tyre. Pop the nut and dust cap on the valve, reattach your wheel, check your brakes and off you roll.
Charlie Allenby is a journalist with a passion for pedalling. He contributes features and buying advice about cycling, and is Coach’s dedicated turbo trainer reviewer. He is also Coach’s chief whey and casein protein powder tester, trying as many brands as possible.
Charlie’s first book, Bike London, is out now. He has written for The Guardian, The Independent and BikeRadar, among others.

