How To Do The Reverse Lunge And Why It’s The Lunge Variation You Need To Master
One step back for man, one giant leap forward for strong thighs, but only if you master your reverse lunge form
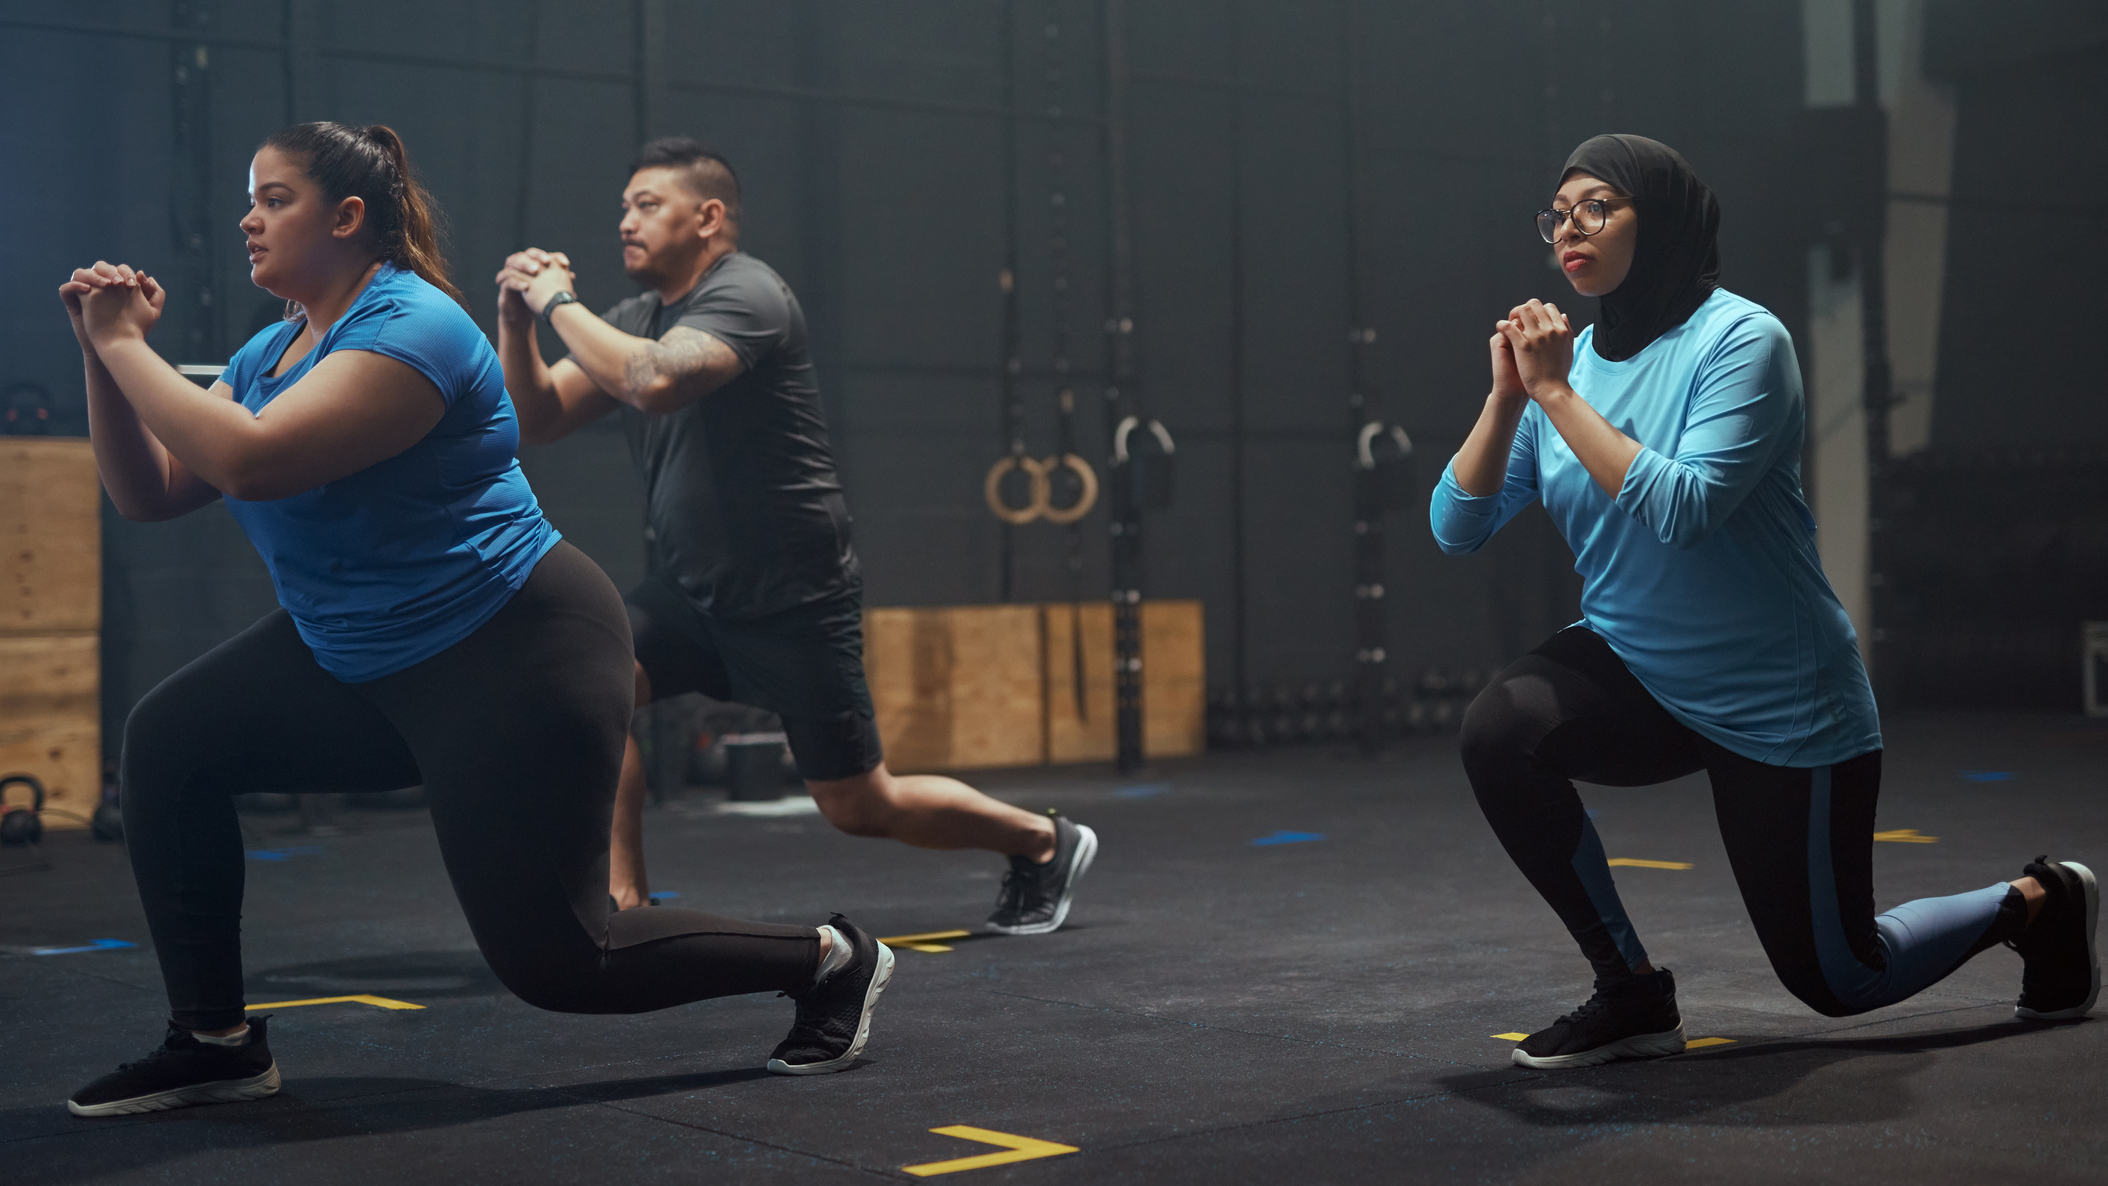
Whether in reverse or moving forward, the lunge is a terrific functional exercise that everyone should take the time to master. It works all the lower-body muscles in a manner that directly translates to improved athletic performance, whether your game is running on track or field or simply running when late for an appointment.
Every rep will simultaneously improve mobility and range of motion of your ankles, knees and hips, too. While both the forward and reverse variety will strengthen your thighs, glutes and calves, the latter has the edge because the forward momentum generated when you drive back up to the starting position more closely mimics the mechanics of running.
It’s also more beginner-friendly and better suited to adding load because it’s easy to under or overstep and get your weight in the wrong position during the forward lunge. In reverse, you’ll naturally keep your weight over your front heel, helping maintain your balance and reduce the strain on your back knee.
To further unpack all the benefits, common mistakes, regressions and progressions for this exercise, we spoke to Waz Ashayer, trainer at fitness app Fiit and group fitness manager at Equinox, NYC.
Which is better, the forward or reverse lunge?
For Ashayer, it’s no contest. “The reverse lunge is far easier to perform than the forward lunge,” he says. “It allows you to effectively and safely target the glutes and hamstrings of your posterior chain without putting undue strain through your front knee, as is commonly the case with the forward lunge.”
That’s not to say both varieties don’t deserve their place in a comprehensive lower-body workout routine—or, indeed, can’t be programmed in the same workout. “I prefer to program forward lunges on quad and knee dominant days, and save the reverse lunges for posterior-focused days.”
Combining a forward lunge and reverse lunge in your leg day workouts would be an effective way to develop well-balanced strength and mobility in your quads, hamstrings and glutes. Just remember to also incorporate some lateral movement, such as with the side lunge or Cossack squat, for all-round athletic development.
And when adding load, Ashayer always recommends starting with the reverse lunge, which provides a more stable base and carries less risk to the lower back.
“Holding a kettlebell in a goblet position [cupped in both hands in front of your chest with the handle facing down] is my favored starting point when introducing resistance to this exercise,” he says. “It teaches you how to hold and brace your core throughout the movement.” This will help protect your spine when introducing resistance for all other variations of the lunge.
How To Do The Reverse Lunge
You might assume that a reverse lunge is exactly the same as a forward lunge done backwards. You’d be more or less right. However, there are a few subtle differences and changes in dynamics that you need to take on board, which we’ve broken down below.
The set-up
Stand with your feet hip-width apart and your hands on your hips or held together in front of your body. Look forward and take a deep breath in to brace your core. Remember to keep your torso upright throughout the exercise, rather than leaning back or slumping forward.
The reverse step
Take a big step back with one foot. “To keep your balance, always maintain a hip-width or even shoulder-width lateral distance between your feet with each rep,” says Ashayer. Bend your front knee to slowly lower your back knee toward the floor, while keeping your torso upright.
Get the Coach Newsletter
Sign up for workout ideas, training advice, reviews of the latest gear and more.
Aim to lower your knee to the floor if you can, or else lower it only as far as you can without breaking your form. “Remember to stabilize through the entire foot of your front leg,” says Ashayer. Think about your toes gripping the floor, and distributing your weight evenly across the full length and width of your foot.
The forward return
Powerfully push through your front foot while bringing your bodyweight forward to return to the upright starting position. Reset and begin the next rep, either on the same side or by switching legs.
Common Mistakes With The Reverse Lunge
Although the reverse lunge requires arguably a simpler technique than the forward lunge, it can still be hard to get just right. Here are a few common mistakes Ashayer has spotted and how to fix them.
A Soft Center
You may find that doing reverse lunges is exerting undue strain on your lower back and spine. “A lack of core engagement, especially when loading this exercise, is typically the culprit,” says Ashayer. Brace your core by taking a short, sharp intake of breath into your belly before each rep. Only breathe out as you drive up out of the lunge. Any lunge should focus as much on the core as on the lower body.
Shifting Too Much Weight Onto The Back Foot
Another common error with this exercise comes when shifting too much weight onto the back foot, which exerts undue pressure on your knee. “The majority of your bodyweight should be held by your front foot,” says Ashayer, “with the back foot serving to help maintain your balance.”
To remedy this error, try leaning forward over the front knee ever so slightly, hinging at the hips while keeping your back flat, and keeping your eyes down, looking at the floor just in front of you. This should help keep your bulk over your front leg throughout each rep.
Taking Too Shallow A Step
Lastly, as is common with all lunge variations, the size of your stride is crucial. Too far and you’ll imbalance the move, too narrow and you’ll cramp your joints and muscles, limiting your range of motion and undermining all your efforts.
With the reverse lunge, try measuring a few variations of stride length until it feels right. Ideally, in the bottom of each rep, the angle on the inside of your front knee should be less than 90˚ and the angle of your back hip should be more than 90˚ for a full range of motion.
Reverse Lunge Progressions
Reverse lunge with weights
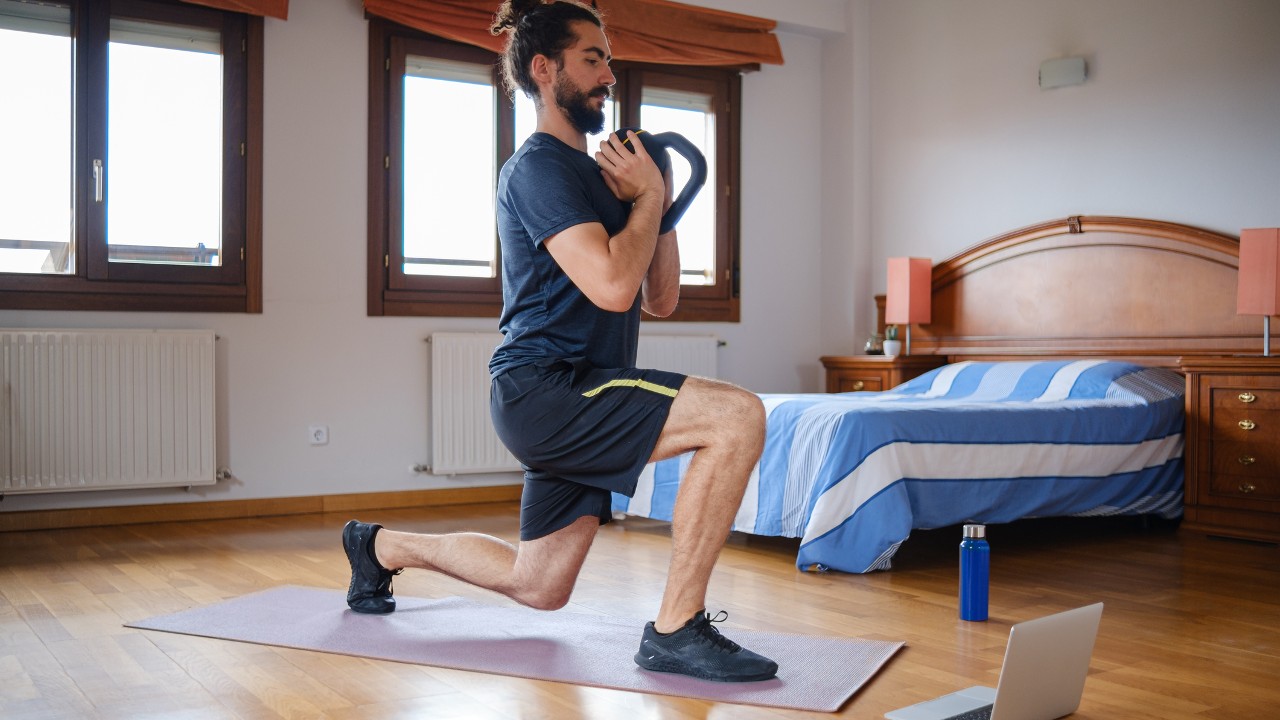
Once you’re comfortable with the bodyweight version of the reverse lunge, add a little weight to make the exercise more challenging. The best, and safest way to introduce resistance, says Ashayer, is by holding a single dumbbell or kettlebell in a goblet position in front of your chest. Cup the weight in both hands, keeping it tight to your body. A strong core will be all the more vital when adding load, so remember to take a deep breath to engage your abs before each rep. Breathe out only when driving to stand.
Reverse lunge to biceps curl and shoulder press
When time is of the essence, add an upper-body element to this lower-body exercise. Hold a pair of dumbbells by your side as you lunge back. Then, as you return to the starting position, curl the dumbbells up to your shoulders, then press them overhead. Return them to your side as you reverse into the next lunge.
More Lunge Variations
Expanding on Ashayer’s suggestions on when to plump for the reverse lunge, and when to opt for an alternative, we’ve listed some more versions of the lunge movement.
Forward lunge
Shifting the focus from the hamstrings and glutes to the quads, the forward lunge mirrors the technique of the reverse lunge. Stand with your feet hip-width apart and take a big stride forward, then slowly lower your back knee toward the floor. Ensure there is enough lateral space between your front and back knee to help maintain your balance. Look forward, keep your core engaged and torso upright, then drive through the front leg to return to the start.
Walking lunge
To combine the initial phase of the forward lunge and second phase of the reverse lunge, try this walking progression. Lunge forward as normal, but instead of pushing back up, move your back leg forward so you go straight into another lunge, keeping your torso relatively upright throughout.
Side lunge
The side or lateral lunge mimics the movements of sports like soccer and rugby, where only moving forward and back would make you a liability to your team. It also enlists some extra muscles in your inner and outer thighs. From a standing position, take a big step to the side and lower until the knee on your leading leg is bent at 90°, keeping your trailing leg straight. Then push back to the center.
Jump lunge
The jump lunge is the most advanced variation here, but it’s still an exercise that almost anyone will be able to do once they’ve got to grips with the standard version. Start by stepping forward into a lunge, but instead of pushing back to standing with your feet together, power into the air by driving off your front foot. Switch your legs in mid-air so you land ready to drop into another lunge on the opposite leg.
This version of the lunge helps build explosive power in your legs and is a must-do move for runners looking to increase their speed and weightlifters looking to add more force to their clean and jerk or snatch.
About Our Expert
Wassim “Waz” Ashayer is a trainer at fitness app Fiit and group fitness manager at Equinox NYC. Originally from London and now based in New York City, he is one of the industry’s most sought-after PTs and recently co-founded pop-up fitness brand Raise x Take Off. Ashayer has a series of qualifications from the National Academy of Sports Medicine (NASM) including Kettlebells, Group Fitness Training, Circuit Training and a Diploma in Personal Training. He is also a certified TRX trainer.

Sam Rider is an experienced freelance journalist, specialising in health, fitness and wellness. For over a decade he's reported on Olympic Games, CrossFit Games and World Cups, and quizzed luminaries of elite sport, nutrition and strength and conditioning. Sam is also a REPS level 3 qualified personal trainer, online coach and founder of Your Daily Fix. Sam is also Coach’s designated reviewer of massage guns and fitness mirrors.
- Nick Harris-FrySenior writer

