Seven Steps To Perfect Eyebrows With HD Brow
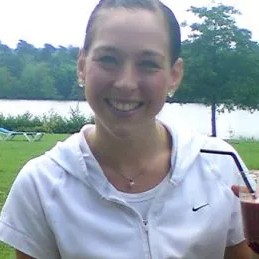
Bride-to-be Lucy Miller tidies up her eyebrows ahead of her big day

They say that your eyes are the windows to your soul, so if that’s true – I have a very shabby pair of curtains! My brow hairs are awful. They grow in different directions, and grow amazingly quickly, which has led me to over-plucking them and getting slightly tweezer happy!
So when I heard, of the new treatment HD Brows, a seven-step treatment, developed by the Nouveau Beauty Group, to leave with you the best brows for your face I thought I would give it a go – according to all my wedding magazines, shaping and tidying your brows can change and alter the shape of your face.
The 7 steps are as follows.
1. Consultation
This helped me and my stylist, Jane to determine which brow shape would best suit my face, what colour my brows should be and the usual filling in of a form with all my basic details and allergies.
2. Tinting
If you have thin, or over plucked brows like me, you don’t need to worry because the consultant will tint your brows to match your hair or natural colour. Jane chose a dark brown colour, to match my hair. The dye was left on throughout the whole procedure and I was advised to leave it on for a further 24-hours to help it develop further.
3. Waxing
I’ve had my brows waxed before, so knew there wasn’t much to worry about here - I find waxing around the eye area is relatively pain free. Jane used a specially created wax to ensure that it doesn’t pull or hurt the skin, which was used to create the arch and start the whole shaping procedure.
4. Trimming
My brows were then combed through and trimmed to make sure they were tame and of the same length. A bit like a haircut for my brows!
Get the Coach Newsletter
Sign up for workout ideas, training advice, reviews of the latest gear and more.
5. Threading
Using very fine cotton, Jane then threaded just above my brow to blend the hairs in naturally to the rest of your face. If you haven’t had this before, it’s a weird sensation. It doesn’t hurt but makes a funny noise and is slightly uncomfortable.
6. Tweezing
This was the most eye-watering part of the process in my opinion, but because Jane had waxed and threaded already, there wasn’t much left to pluck out, just the odd hair here and there. My eyes watered, but I wasn’t crying, honestly!
7. Aftercare
Jane then ran through how to care for my new brows and filled in any sparse areas with the HD brow kit. She also gave my some HD Brows Grow Baby Grow, which should help to nourish weak hair follicles and speed up hair growth on the areas I have over-plucked. She then finished off with a sprinkle of mineral make-up to take down the redness, so I could go back to work without people noticing I had had my brows beautified. There is nothing worse than walking around with bright red eyebrows from the waxing and threading. It definitely did the job and covered it well.
The whole treatment took just 30-minutes and should last a good six to eight weeks. Having perfect brows completely enhanced my facial features and made any makeup look ten times better. I love having a tidy eyebrow arch and will be definitely be going back for a top up.
This article first appeared in Women’s Fitness

Lucy Miller is an experienced journalist who has worked across a range of health and fitness titles. She was the fitness and nutrition editor at Men’s Fitness UK, and has also been fitness editor of both Health & Fitness UK and Women’s Fitness UK. Lucy qualified as a NASM-certified personal trainer and nutritionist in 2008.
